
嘗試在Virtual box中的Arduio IDE測試esp32的教學範例,驗證OK,但上傳時總是出現錯誤:Permission denied: ‘dev/ttyUSB0’,似乎無法開啟序列埠。請問可知是何原因?
Category: Arduino(ESP32) / nodeMCU-32S
本範例主要是針對Arduino (ESP32)單晶片使用單核心情況下,往往因為delay指令,讓程式在執行過程中產生暫停或卡住,須等delay的時間過後,主程式才能繼續進行。這樣會造成其他需要同步偵測的感測器或驅動的程式無法進行,並造成程式執行的不順利或停頓現象。
以下我們介紹Arduino提供的 millis()指令,讓你的程式不中斷,繼續跑,並且不會卡住。並以一個鐵路平交道的情境為例,用鍵盤J按下後作為觸發訊號(模擬火出通過),LED燈開始閃爍,蜂鳴器也同步動作,經過一段時間後同時結束,可重複上述情境。
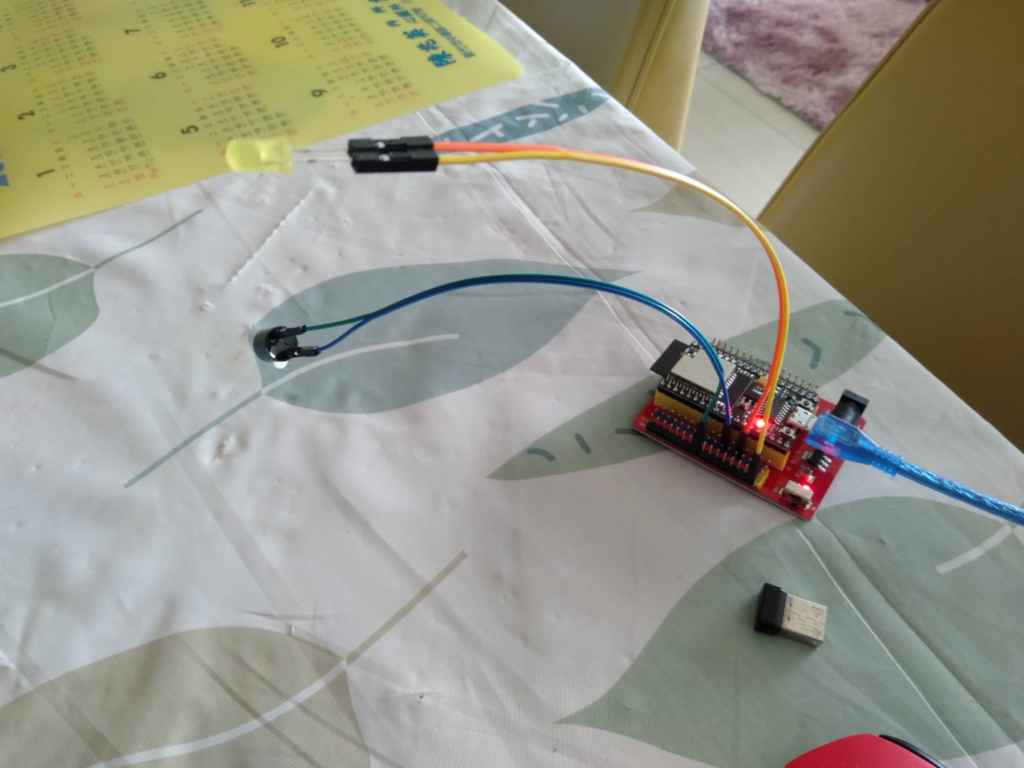
使用零件 :
- ESP32S (NodeMCU32)
- 上述專用擴展板 (可連結本公司網站購買或加LINE線上洽詢)
- LED x 1
- 5V 蜂鳴器 x 1
- 母-母杜邦線 x 4
以下是程式碼供參考 : @Z機研工作室 提供。
bool execute_alert_procedure = false;
int execute_alert_procedure_Time = 0; //一次警報的時間 或 警報週期
int buzz_Pin = 14;
int execute_buzz_time=0;
bool execute_buzz = false;
int Led_Pin = 13;
int execute_Led_time=0;
bool execute_Led = false;
void setup()
{
UserControlInit();
pinMode(buzz_Pin, OUTPUT);
pinMode(Led_Pin, OUTPUT);
}
void loop()
{
MessageRead();
if (execute_alert_procedure){
if((millis()-execute_alert_procedure_Time)<10000){ // (現在的系統時間 – 開始執行警報的系統時間)< 10秒 ; 10秒可以自行修改 if((millis()-execute_buzz_time)>500){ // buzz 發聲的頻率
if(execute_buzz){
digitalWrite(buzz_Pin, LOW);
execute_buzz = false;
}else{
digitalWrite(buzz_Pin, HIGH);
execute_buzz = true;
}
execute_buzz_time = millis();
}
if((millis()-execute_Led_time)>500){ // LED 亮滅的頻率
if(execute_Led){
digitalWrite(Led_Pin, LOW);
execute_Led = false;
}else{
digitalWrite(Led_Pin, HIGH);
execute_Led = true;
}
execute_Led_time = millis();
}
}else{
execute_alert_procedure = false;
digitalWrite(Led_Pin, LOW);
digitalWrite(buzz_Pin, LOW);
}
}
}
// UserControl
void UserControlInit(){
Serial.begin(115200);
}
// 讀取鍵盤觸發指令
void MessageRead(){
if (Serial.available()){
MessageProcessing(Serial.read());
}
}
// 判斷鍵盤命令並設定開始警報的時間
void MessageProcessing(char data){
Serial.print(data);
if (data == ‘j’){
execute_alert_procedure = true;
execute_alert_procedure_Time = millis(); // 設定每次開始警報的時間=當下Arduino晶片的絕對時間
}
}
// ———–
蜂鳴器接 Pin 14
其他參考 :
https://www.arduino.cc/reference/en/language/functions/time/millis/